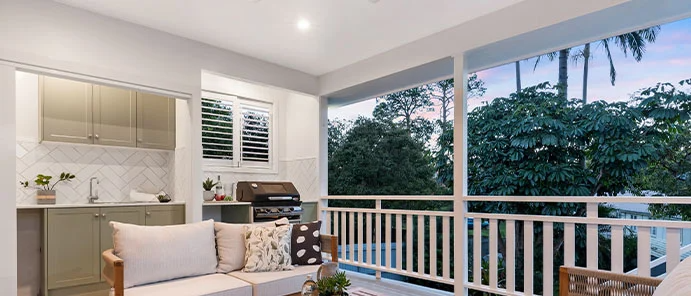
Australians love spending time outdoors and the alfresco area has become almost standard in many modern homes.
Plasterboard is a popular choice for the ceiling of the alfresco area, and it is easy to understand why. A plasterboard ceiling and cornice visually connect the outdoor area with the rest of the house and enhances the outdoor space.
Ceiling fans, downlights and even speakers are often attached to external ceilings, and a plasterboard ceiling provides a stylish backdrop.
Plasterboard is also used in the ceilings of carports, balconies, breezeways and other external areas. (Please note that plasterboard must not be installed in eaves or as exterior cladding.)
The external ceiling is always exposed to the natural elements, and with higher exposure comes higher risk. The results of a failing external ceiling are not only unsightly but can be very costly and even life-threatening.
In 2017 a Perth family woke up to a crashing noise when the ceiling in their alfresco area - their toddler’s favourite playing area - collapsed without any prior signs of damage.
To guarantee long-term enjoyment of the outdoor area, it is important to install the external plasterboard ceiling correctly from the start and to strictly adhere to manufacturer’s instructions.
Common problems
External ceilings are subject to harsher conditions than internal ones and need additional protection from the weather. Common problems with external ceilings include:
- Condensation on the plasterboard
- Condensation on framing or roofing and dripping down on to the back of the plasterboard
- Water penetrating the paint system
- Distortion of the joints
- Plasterboard sagging
- Mould growth
- Fastener popping
- Corrosion of ceiling framing
Minimum conditions
Siniat recommends the following minimum conditions when using plasterboard and steel ceiling framing in external ceilings:
- The plasterboard and associated substrate must be designed for the appropriate loading conditions including wind loads. Down-struts must also be included to prevent uplift.
- The cavity above the plasterboard ceiling must comply with the requirements of NCC Volume One, Part F8 or NCC Volume Two, Part 10.8. Bear in mind that continuous airflow in and out of a ceiling cavity near salt water may decrease the durability of steel framing.
- Condensation on the back and front of the plasterboard lining and any steel framing must be controlled. Use condensation prevention measures such as adequate roof cavity ventilation and thermal insulation. Foil-backed insulation must be used under a metal roof.
- Thermal insulation is recommended directly above the plasterboard. This will minimise the temperature difference between the plasterboard and the outside air and reduce the risk of condensation that may result in ceiling sag and mould formation.
- Anchors and fasteners must be minimum Class 3 or higher depending on the application, or protected from corrosion by other means. Note that stainless steel fasteners are not permitted with galvanised or Zincalume-protected steel.
- The plasterboard, compounds and steel framing must not be subjected to any direct water, long periods of high humidity, sea spray or damp conditions.
- The plasterboard and compounds must be installed after the roof covering has been completely installed and sealed.
- There must be a minimum clearance of 100mm from external ceiling lining to lower edge of verandah beam or masonry intel, otherwise protection against wind-blown rain must be provided.
- We recommend periodic inspections of any steel ceiling framing to identify any areas of corrosion or damage which must be immediately rectified.
Installation requirements
- We recommend using 10mm Spanshield, 13mm Mastashield, 10mm Opal, 10mm or 13mm Watershield, 10mm or 13mm Soundshield or 13mm or 16mm Fireshield for use in external ceilings. For extra peace of mind against mould protection consider using Multishield or Trurock.
- Ceiling framing should be installed at maximum 450mm framing centres.
- Provide additional framing around the perimeter by inserting trimmers between ceiling frames or installing steel angle, or installing additional ceiling battens.
- Fix the ceiling plasterboard using the Screw Only Method. Nails are not permitted in this application. Please note that additional screws may be required for high wind areas.
- Fix the perimeter of the plasterboard sheets using screws at 300mm maximum spacing.
- Install control joints at 6m maximum intervals and back-block all plasterboard joints.
- Plaster set joints using two coats of Mastabase or Mastalongset and any Siniat finish coat.
- Apply a high-quality sealer undercoat designed for exterior use.
- Use a premium exterior paint system that includes a mould inhibitor.
Painting
The long-term success of an external ceiling also depends on using the recommended paint system. Improper paint products or techniques can impact negatively on the appearance and performance of the external ceiling and contribute to issues such as sagging ceilings, joint discolouration and mould growth.
Paint on external surfaces also needs to withstand more regular and vigorous cleaning than internal surfaces because of cobwebs, soot, dust, moth eggs, etc.
Use a premium exterior paint system that includes a mould inhibitor after applying the sealer undercoat.
More information
For more information, please refer to Chapter 5 (Ceilings) of the Siniat Blueprint, or download the Plasterboard Installation Guide.
You can also contact us for more information.
By following the correct installation requirements and using the right products, the alfresco area will be an attractive addition to a home and provide enjoyment for many years to come!